April 15, 2018
The Phoenix
Just under the wire today, linking up to Simon's Monday Challenge Blog--this week's theme is Mythology.
My idea came from the namesake of my current residence and a little research turned up an interesting story of how the city got it's name, who knew dipsomania played a part in it.
In mythology the Phoenix represents rebirth which is exactly what I did with the wooden support for this piece which was originally an Idea-ology burlap panel (6" x 4").
I removed the burlap, applied an image transfer and then colored it with paint and inks and also stamped some text in the background (Stamper's Anonymous Ledger Script).
The technique was similar to this project which became a favorite of mine and I thought I'd have another go at it. I appreciate how it's possible to take advantage of the brown of the support board and convert the positives shapes into negative ones.
April 11, 2018
Ada Again
I have modified a recent collage (see previous post, Ada 1916) by scraping off the photo of my great Aunt Ada and replacing the image with one I like better.
Because the original photograph was a bit thicker than the other collage papers I used, it was pretty easy to get underneath it and carefully peel/scrape it off.
Then I used this image as a transfer and created a mask of the hands and face. I used the mask to apply off-white paint on the background where the image was placed. Since image transfers are inherently transparent, this technique keeps the background from showing through.
The image transfer's darker undertones made it necessary to adjust values throughout the collage using transparent paint (glazing) and I also colored the collage paper flowers.
And finally, I felt the need to contain the composition by adding a border which was made using dots of Scribbles. I think the addition of the black accents helped to emphasize the other black elements in the collage.
April 08, 2018
Ada 1916
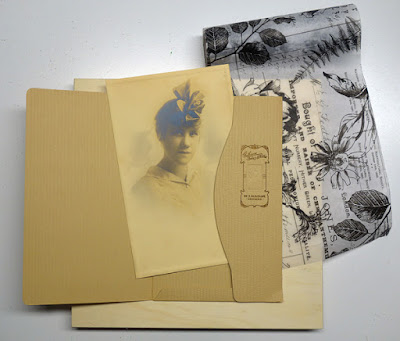
My great Aunt Esther wrote on the back of this photo, "Ada, June 1916." I suspect it is a photograph to commemorate her sister's graduation from high school as I have several copies and the year would be appropriate.
I used a wooden panel (10" x 10"), the new Idea-ology collage paper (Botanical), some Memoranda paper stash and an Idea-ology Collector Layer. All the paper bits were made thinner by rubbing the back side with water and I also used damask patterned tissue paper along with some light pink. The circle scroll design was an image transfer.
(Click on the photos to see a larger, lightbox view.)
The wooden support was gessoed, I pasted on a crinkled sheet of light pink tissue paper, added crackle medium, then rubbed on brown wax to bring out the cracks.
At this stage I was thinking I should have waited to crackle the board AFTER I arranged the collage but in the end it may have been the right approach even though most of the surface was covered up.
Here are some close-ups that show how I layered the collage paper.
Working with the collage paper I learned that, if you don't want the white of the tissue to show, it's important that the glue underneath covers the entire surface. In the photo above, the hand-written name has fewer missed areas of glue underneath than the section of tissue just above it.
My glue of choice for this piece was fluid matt medium. I like that you have a longer working time than a gel medium and that it moistens the paper slightly so it lays down easier. You can get all the bubbles out without using much pressure (which might tear a delicate paper).
Subscribe to:
Posts (Atom)


