/* */ Beulah Bee: tips
Showing posts with label tips. Show all posts

February 24, 2023

Sweet Prize

Today I'm sharing a tag inspired by, of all things, a new craft mat! (Which can only be said by one seriously bonafide and confirmed craft-nerd who, perhaps, should get a life?)

I started with a piece of scrapbook paper (Epiphany by Prima) for the background then layered scraps of Idea-ology Tissue Wrap, washi tape and stenciled tissue paper along with a hand-cut vintage image.

It was tinted with Distress inks and stenciled texture paste (Dot Fade by Tim Holtz). The text is a Clipping Sticker.

My trusty 10+ year-old Ranger Inkssentials craft mat was getting harder to clean and I didn't realize just how shabby it had become until I got a new one.

I keep it mounted on an inexpensive canvas panel with double-sided Scotch tape on the inside edges and strips of packaging tape around the outside edges. The back side of the panel is coated with gel medium to protect it from wetness.

This one is 9" x 12" and I use it most often but also have a larger one (14" x 18") mounted in the same way when I need a bigger work surface.

As always, I hope this post finds you well and happy and I appreciate your visit.

Until next time, take care.

October 12, 2022

Perfidy & Travail

I'm sharing a tag today that's made with a Found Relative, Remnant Rubs, and scraps of Paper Stash, embellished with Liquid Pearls and typewritten text.

The girls were roughed up a bit with a damp piece of Magic Eraser (perfect to use when a "gentle touch" is best) to lighten their flat black outfits that were then tinted with Pitt Brush Pens.

I also cut out tiny bits, here and there (around their arms, faces, etc.) to improve the factory cutting and make them appear more realistic. A final important step is to paint or ink the edges (I used black) to make the white paper backing blend in with the background (best to do before pasting).

I also scraped through the Remnant Rubs with an Xacto knife to further the distressed look.

I'm linking up to the Simon Monday challenge which is a "Fall Mood Board."

As always, I hope this post finds you well and happy and I appreciate your visit.

Until next time, take care.

September 15, 2022

Delicate Flowers

After much experimentation, I've finally settled on the best way to use my recently purchased jar of Ranger's Distress Clear Rock Candy Dry Glitter.

It used to be made as a wet product contained in a Stickles bottle and I loved this stuff. Sure, it could reactivate inks or wrinkle paper due to its high moisture content but I could work around this--no problem.

So I set about mixing various mediums with the dry glitter to use in an empty squeeze bottle like before. Unfortunately nothing I tried worked, I went back to basics, and this card illustrates a technique that will have to do.

Using Simon's Delicate Flowers stamp set on a page of Paper Stash, I fussy-cut then pasted an arrangement on more Paper Stash (this time stained with Seedless Preserves) and mounted on black paper using strips of the same for balance.

I painted on small sections of fluid matte medium then used my fingers to lightly sprinkle the dry glitter over the area before the medium dried. I found that a light application was better than a dump (like you would do with embossing powder) and sometimes it was necessary to apply two coats to get the look I was going for.

I'm linking to Simon, this week's prompt is "Use Die-Cuts" (how I made the card text).

As always, I hope this post finds you well and happy and I appreciate your visit.

Until next time, take care.

April 17, 2022

Sweet Pea

Greeting Card

I traced an image of a Sweet Pea then used watercolor for tint, created a background mask from scrapbook paper and used a fine line marker to create the frame borders.

To create the mask, I used deli paper to trace an outline of the oval and flower parts then inserted the tracing on top of the scrap paper for cutting.

For better emphasis, I later outlined the watercolor drawing. Maybe I am so used to stamped images that the no-line effect just didn't seem right to me.

I used dimensional dots for accent (Scribbles) and I left off any text so that I can customize the card when I'm ready to gift it.

I'm linking up to the Sweet Treat challenge at Simon.

As always, I hope this post finds you well and happy and I appreciate your visit.

Until next time, take care.

December 20, 2021

Christmas Tag No. 6 for 2021

I recently discovered a vintage image (by photographer Monty Fresco) and just had to use it. After printing, it was fussy-cut and mounted on scrapbook paper (Stamperia Christmas Patchwork).

I decided to stamp some houses in the background (Carabelle Studio Dans la Rue) but I'd already pasted the image so I needed a mask. I'm sharing a quick technique which is to use a piece of deli wrap to make a pencil rubbing.

After stamping, I used some Stickles to trim the border and should mention that I tinted the photograph with inks and a paintbrush.

As always, I hope this post finds you well and happy and I appreciate your visit.

Until next time, take care.

June 27, 2021

A Little Story

Browsing the British Library's Flicker account (where they have digitized a tremendous amount of their collection), I came across this image which inspired me to make a card.
 
After printing the image on plain white copy paper I knew cutting it out would be a challenge given the thin streaming lines. So I covered the image with a wide strip of clear packaging tape, sanded over the top of it to remove the sheen and then cut it out. The tape helps to reinforce the paper while cutting and makes it more durable for pasting, etc.

It was placed over a scrap of deli wrap that was painted using a gelli plate and stamped with archival ink.


I framed the image on thin, dark, warm gray paper and pasted it over some Tim Holtz scrap. It was mounted on heavy white card stock to form a card. The text is a Remnant Rub.

My apologies as the photos lack sharp focus (they look better in the lightbox feature). It's been a struggle to get good images indoors, we've been over 110° for several weeks now so that's my excuse and I'm sticking to it ☺.

I'm linking up to Simon this week, the challenge was to use something clear and my packaging tape technique should qualify.

As always, I hope this post finds you well and happy and I appreciate your visit.

Until next time, take care.

December 23, 2020

Praying for Time

 Praying for Time 

 
I've used a favorite Found Relative for this tag, I can't explain why this image appeals to me like it does and I only use it for special pieces. 

This Christmas tag has a melancholy side as I made it to commemorate a singer songwriter who passed away four years ago on Christmas day. His name was George Michael and he wrote a song called "Praying for Time." The words to this ballad are especially poignant during the holiday season and speak volumes about this tumultuous year.

The techniques I used include fussy-cutting, distressing, stamping (hand-carved), and placement of ephemera on some Paper Stash. 

I think it's worth noting that whenever possible, I peel the backs off photos, ephemera, etc., and rub away as much of the paper as I can to make these elements nice and thin. They naturally become more fragile but I encase them with medium (applied to both sides) so they hold up well when pasted down or painted over.

As always, I hope this post finds you well and happy and I appreciate your visit.

Until next time, take care.

July 12, 2020

Good Bye Old Paint


I thought I'd dig out my watercolors and paint a card or tag for Simon's Play with Paint prompt this week. I didn't know I would end up making a color mixing chart instead!

One look at my badly neglected palette (bought years ago by way of a recommendation when I was just a beginner) and I knew it was time to take care of it. The paint was dry and cracked, some of the wells needed to be refilled, etc. It has served me fairly well but truth be told, it is way too big for my needs today and I decided to replace it.

I found a smaller, air tight pallete at Amazon and set about transferring paint from the old one to the new one. It was a tedious undertaking but my paint is expensive (Maimeri Blu from Italy)--I didn't want to waste it and two of my favorite shades are no longer available.

No, I'm not about to tell you how I scraped and reconstituted paints ☺--I just have a few more photos of the palettes then I'll share some links for two really useful websites to learn about watercolor paint properties and how to make color charts that I think you'll appreciate.


If you are a beginner to watercolors (or even if your not), here's a link to excellent, step-by-step instructions for why and how to make color charts (which I used to make mine):


Making the chart was so useful and such a good way to learn about paint properties, to practice control of mixing, and to learn how to get just the right color.

Mine was made large enough to reflect the 18 colors I used in my new palette and it will be an excellent reference going forward. I discovered some new combinations that I can't wait to try!


And finally, I'll share this link for a really good explanation on watercolor paint properties which I frequently use as a reference:


For the most part, watercolor is easy (with good supplies) but what held me back the most was not appreciating that some paints stain, some are opaque, some get muddy and you can't figure out why, etc. This website provides a good explanation and doesn't bog you down with too many details. I highly recommend it.

As always, I hope this post finds you well and happy and I appreciate your visit.

Until next time, take care.

June 03, 2020

Patience


I made a background by stamping (Tim Holtz Ledger Script) on a manila tag with black Archival ink then used several blue and green Distress inks to give it some color.

I transferred this image over the colored text background using gel medium. Because of the transparent nature of image transfers, the background would have been visible underneath the white areas of the image.  To solve this problem I printed a second copy of the image, fussy-cut just the girl and pasted her over the top of the first image layer. She was tinted with more inks and a text label was made with my typewriter.


I'm linking up with Simon's Monday challenge to Make Your Own Background.

As always, I hope this post finds you well and happy and I appreciate your visit.

Until next time, take care.

January 30, 2020

Love Everything


Hello friends, today I'm sharing a greeting card crafted for Valentine's Day. It was made using an image altered in Photoshop before printing, trimming and pasting to my card.

If you're curious what I mean, here's the before/after using a filter called "poster edges."


I cut a paper heart and tinted it with Distress Oxides (Candied Apple and Worn Lipstick), the background was stamped with script and gesso applied to knock it back, washi tape was used to visually anchor the image and a border was cut from striped paper.

I'll mention a very useful (non-digital) technique for altering the color and texture of any image which is scratching the surface with the point of a knife to create lighter areas which can be tinted with color. Here's a close-up to illustrate:


The sentiment stamp seemed perfect for this image and it's one of Simon's from a set called Delicate Flowers. I'm linking this post to their Monday challenge blog because this week's theme is "All Loved Up."

I hope this post finds you well and happy and I appreciate your visit.

Until next time, take care. 

December 13, 2019

12 Tags for Christmas 2019 - Snow Berries


I've got carols a' playing as I prepare this post (David Archuleta's "Winter in the Air") and I am grateful for this time to play and for music of all kinds that I simply couldn't live without.

Stamping of holly berries (Mondo Holly by Julie Ebersole) on watercolored paper along with a bird cut from the Tim Holtz Wallflower paper stash, snow flakes courtesy of a Simon stencil--that's what I used to make tag number 7 of 12 for 2019.


I thought you might appreciate the technique I used for masking and alignment of my stamping so here's a photo to illustrate.


I taped together the masks, laid them on the tag and used an ink blending tool and light colored ink to tap along the mask edges to create an outline I could use to accurately align my stamping.

I'm linking this post to the TFJB Challenge Blog: It's the Holidays.

Use the link on the sidebar or the 12 Tags label at the bottom of the page if you want to see more of my Christmas tags.


October 15, 2019

This Happy Life


Thanks to Columbus, I had the day off yesterday and an opportunity to make something for Simon's Monday challenge (this week's theme is "Pink").

Nothing says pink like a coneflower so I made this tag by stamping on watercolor paper (Tim Holtz Flower Garden), the text is an old Remnant Rub, and the border was machine-stitched and dotted with Nuvo Crystal Drops.

Just a few things, technique-wise, that you might appreciate:


I'm sure you've seen the "no-line" technique when it comes to stamping an image that you plan to watercolor using a light shade of dye (water-based) ink so the lines disappear. But I like the lines! So for this tag, I stamped with archival inks using a pink, a tea stain, and a dark brown shade. The lines darkened somewhat after the watercoloring was applied.


Obviously, I had to do some masking to stamp this arrangement. But I didn't use the stems that come with the set and drew them on instead.

The photo above shows how I painted the background first using a juicy puddle of cobalt blue.


The bee was an after-thought. It was stamped onto a piece of tissue paper, cut-out, pasted on and then I dabbed a tiny bit of yellow paint on to its body.

It's also worth mentioning that I prefer to use a "hot-press" version of watercolor paper when I plan to stamp on it. Cold-press has bumps that I think make it harder to get a crisp image.

If you haven't tried watercoloring with rubber stamps, I can tell you it really is a lot of fun and very rewarding. Go for it!

February 13, 2019

Happy Valentine's Day


My good friend Thelma (I'm Louise) introduced me to card-making and it's understood that the cards we exchange between ourselves can be an outside-the-box/anything goes kind of flavor. Because there are no rules it makes our tradition that much more fun.

This is the card she will receive tomorrow, made from an assortment of papers (mostly Authentique) including one called "Stitches Two" which is the band running through the center.

The card also includes a hand-colored printable (background heart border) that I distressed and embellished with dots of Scribbles (3D fabric paint). I used an assortment of gel pens for the coloring.


I have a very limited stash of sentiment stamps so this one was taken from an example found on the net. My technique is to print the example, rub a thick coating of graphite (pencil lead) on the back, tape it down with washi and trace over the top of it. This transfers most of the outline of the lettering and then I go back over it with a fine-tipped marker. The heart trio was stamped.

October 25, 2018

Few Passed Them


Here's a post about the way I used Plain Collage Paper (Ideaology) to create a mirror image of a stamp and how to reduce transparency by painting on the back side.

I'm linking up to Simon's Monday challenge--this week's theme is Halloween.

The background is made from various paper scraps tinted with Distress inks and the gate (yes, I know it's upside down) is a die-cut from Tim Holtz called Gothic Gate.

The house and skull are stamp images from a 2016 set called Mini Halloween 5 and the kids are a classic called Photo Studio (Tim Holtz).

I used some words from Ideaology Clippings Stickers and tinted a tiny diamond with red alcohol ink.

As you can see, the house is single-sided but I wanted to create something a little different.


So I stamped the image on Plain Collage Paper then turned it over and stamped the image again on the backside to create a mirror image. They were trimmed and pasted together to create the larger house.


The family was also stamped on the Plain Collage Paper but I painted the backside with off-white paint to reduce the transparency to make sure the facial features didn't get lost. Once the image was pasted down, I used inks to lightly tint it.


I really like the properties of this collage paper and plan to stock-up in case it's discontinued as I have been using it a lot!

July 05, 2018

Stamp Conversion


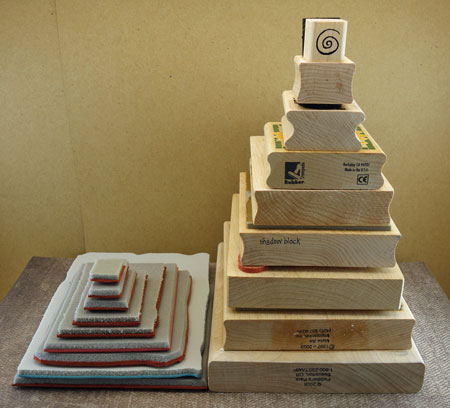
I recently purchased a stamping platform and I am over the moon about it! Stamps I avoided in the past because they were difficult to use no longer scare me. And because I want to use ALL my stamps with this new tool, I have converted my collection of wood-mounted stamps to cling-mount.

I want to share some things I learned during the process to help others who might also want to do this. There is already a lot of information on the web but it didn't really prepare me for what I was up against.

You will need to purchase the cling mount sheets. I used a brand called EZMount and buyer beware, there are two sizes: Regular which is 1/8" thick and thin which is 1/16" thick. Go to the manufacturer's website (Crafter's Companion) and the product descriptions will explain the difference. I used 1/8" thick foam for all my stamps but your needs may be different.

This was a good time for me to purge some of my inventory and donate stamps I no longer care for, giving me a better idea of how much cling mount to buy. I only converted my favorites and didn't convert really tiny ones.

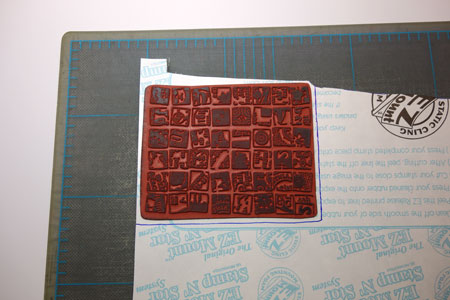
Make sure to measure out your stamps on the printed side with the stamp facing up and give yourself some wiggle-room with the margins. This is because it's tricky to lay the stamp down exactly where you want it during the final mounting and you'll be able to trim it more cleanly if you leave a little more room.


I didn't use scissors to trim the stamps. I used a utility knife instead and think it was MUCH MUCH easier. When I came to some curvy parts, I just made tiny stabs around it with the knife--no problem.


You may get some "sticky-stuff" on your knife blade or your fingers. I used paper towels to wipe off the knife blade and gel hand-sanitizer for my fingers. You don't want to transfer any of it to the image-side of your stamp so keeping things clean is kind of important.

Okay, that was the easy-part. The hard part?

Nothing I read on the web prepared me for the challenge of cleaning the stamp's backside once it was removed from the wood base. Each and every stamp came off differently and presented new challenges.

A few peeled off perfectly and required no additional effort--they were ready to remount. Most peeled off the wood base pretty easy but no matter how carefully I worked, remnants of either foam or dried glue or really tacky glue remained on the backside.

The cling-mount instructions state that this side should be clean before mounting and I accepted the challenge. Here are some examples:


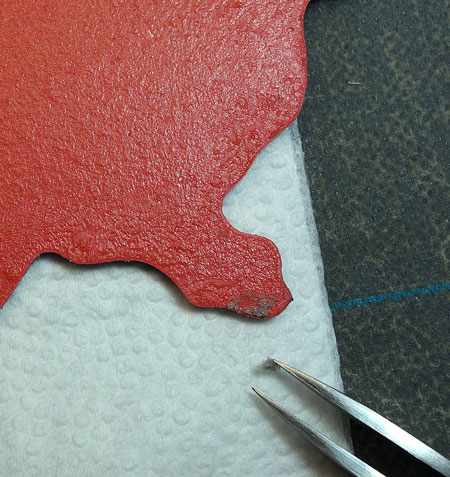
In the photo above, the original glue (still VERY tacky) remained on this stamp and I only had to pick away at the few bits of foam, left the glue intact and it was re-mounted.


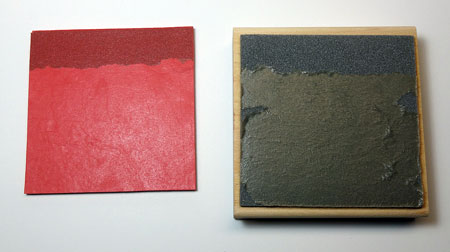
In this example, the stamp peeled fairly cleanly except for some foam areas and the glue holding it on was dried out and very hard. I used a grout saw which has a sandpaper like edge to scrape away the remaining bits.


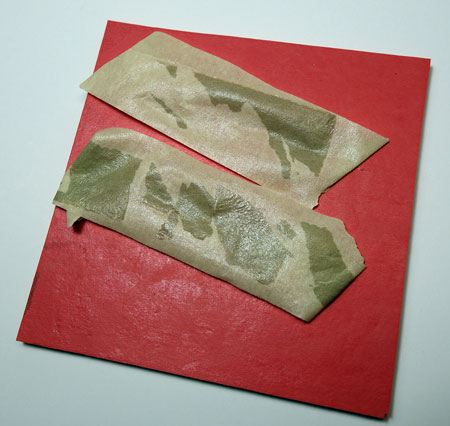
Here's another example of what remained after a peel from the block only this time, the remnants (glue and foam) were still somewhat sticky and would be difficult to try to rub off (think price tag on plastic).


So I used a strip of high-adhesion masking tape, rubbed it down over the remaining bits and voila! It pulled off the glue and the foam easy-peasy (wish I'd thought of this sooner).


In my last example, the foam and glue that remained on the stamp was roughed up with my scraper first and then I used masking tape to pull off the loose material.


If you are still reading along, I'll end this post with a couple more tips/suggestions that you might consider:
  • It will be tempting but don’t use "Goo-Gone" or "Goof-Off" or similar solvent-based products as they are not recommended for use on rubber and could damage your stamp.
  • If your stamp is of a ruler or similar image where having a really straight edge is important, don't forget to mount it on the foam as straight as you can. The rubber is flexible and kind of floppy and that could work against you during your placement.
  • Before remounting, it's a good time to give the image-side of the stamps a good cleaning and also to re-trim problem areas that the manufacturer may have missed.
  • Do the easy, least favorite stamps first until you get the hang of it.
In the end, I am SO GLAD I tackled this and I can't wait to give new life to stamps that will shine under the control of my stamping platform.

My storage needs have changed and I plan to blog about a rather unique solution at a future date that you may enjoy reading about as well.

Until next time, Happy Stamping!!